
How to Draw Free-Body Diagrams
A free-body diagram shows the forces acting on one object. Learn what to include, what to leave out and how to turn the diagram into an equation.
Deepak Kumar ·
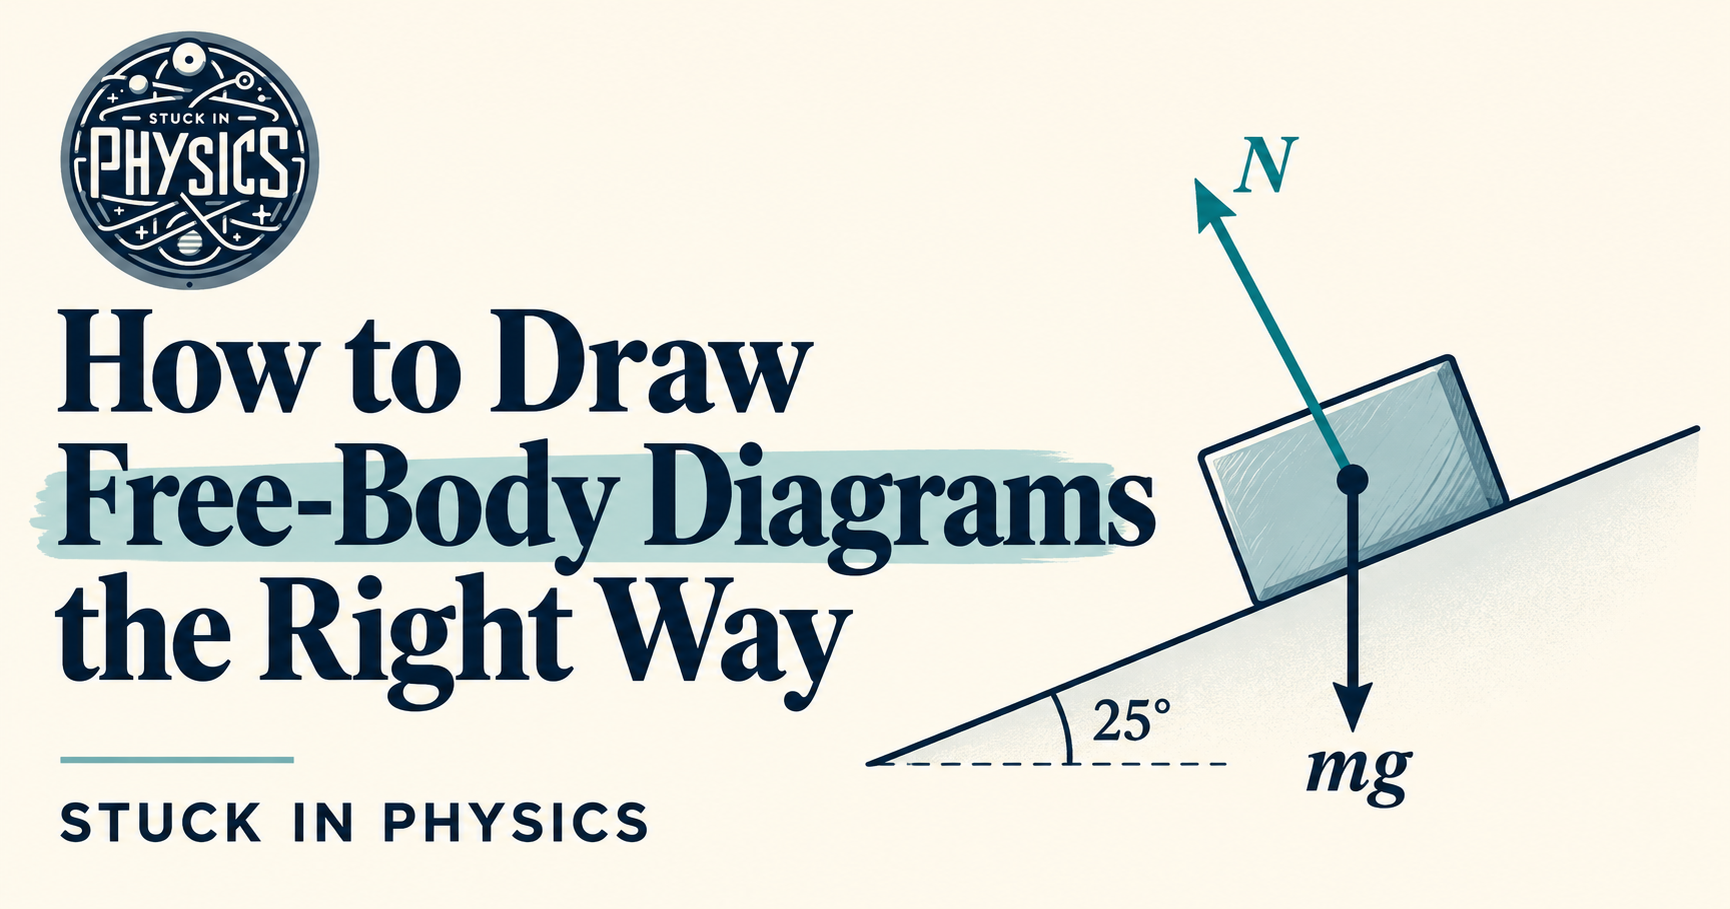
A free-body diagram is more than a few arrows around a box.
Its purpose is to help you see every force acting on one body, so you can write the correct force equation:
You do not need an artistic drawing. You need a clear diagram where every arrow has a reason to be there.
1. Choose one body
Separate the bodies in the situation. Draw a free-body diagram for each one.
For every arrow, ask:
“What is exerting this force on my chosen body?”
Only include forces acting on that body. Do not mix in forces it exerts on other objects.
2. Start your arrows at the body
For a particle-style free-body diagram, use a dot or a simple box.
Draw each arrow with its tail at the body and its arrowhead extending outward, pointing in the force’s direction. Label it clearly.
If you know that one force is larger than another, make its arrow longer.
For questions about moments or rotation, show the actual points where the forces act.
3. Normal contact force is perpendicular to the surface
This is one of the most common mistakes I see.
The mistake: Drawing the normal contact force vertically upward, even when the block is on an incline.
The fix: Draw it perpendicular to the contact surface.
“Normal contact force” is a useful name: normal means perpendicular, and contact reminds you that the force requires physical contact.
Weight still points vertically downward near Earth’s surface.
Also, do NOT automatically assume:
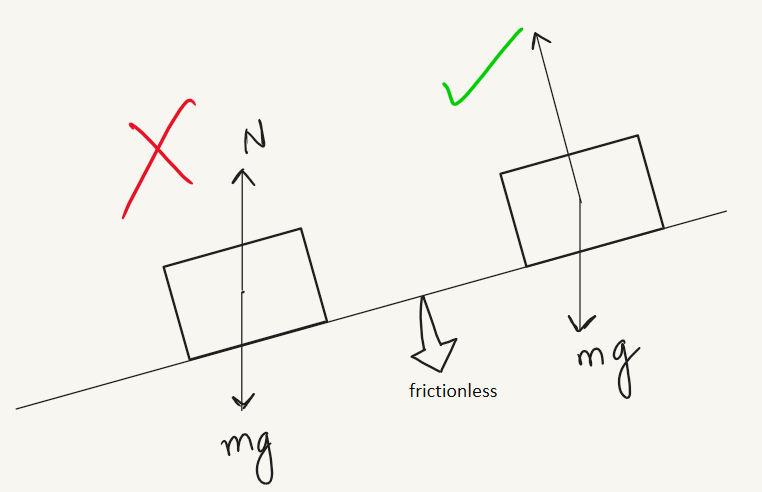
That equality holds for a block on a horizontal surface when there are no other vertical forces and no vertical acceleration. It follows from the situation—not from the name of the force.
4. Velocity is not a force
The mistake: Adding a rightward force arrow because the body moves to the right.
The fix: Show only actual forces.
A body can move right while the resultant force points left—it will slow down. It can also move at constant velocity with zero resultant force.
Keep velocity and acceleration arrows on a separate motion sketch if you need them.
5. Do not add an extra “centripetal force”
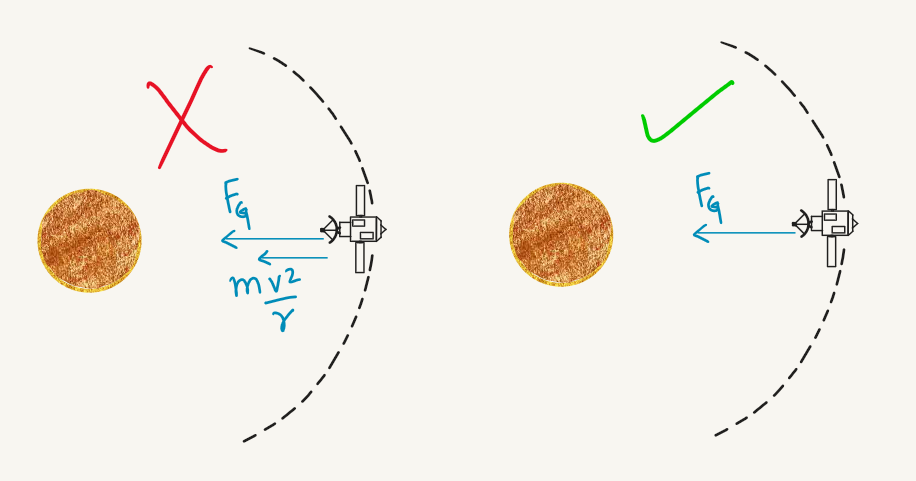
The mistake: Drawing tension, weight and another arrow labelled “centripetal force.”
The fix: Draw the actual forces, then find their net inward component:
“Centripetal force” describes the inward resultant required for circular motion. It is not an additional force.
For a satellite in a simple circular orbit, gravity provides that inward force. Draw gravity once.
6. Opposite forces are not automatically equal
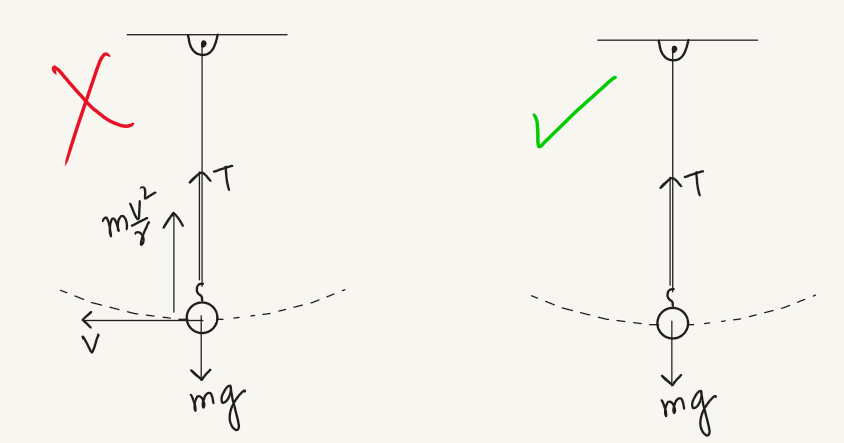
Consider a particle on a taut string moving through the bottom of a vertical circle, with only tension and weight acting.
Tension points upward, towards the centre. Weight points downward.
The particle needs an upward radial acceleration, so:
Therefore:
For nonzero speed:
Draw the tension arrow longer than the weight arrow. Equal arrows would show zero resultant force, which cannot provide the required circular acceleration.
7. A rough surface does not always mean friction
Before drawing friction, ask whether the surfaces are sliding—or tending to slide—relative to each other.
Block rests on a horizontal floor with no horizontal push - No friction is needed
Block is pushed but stays at rest - Static friction opposes the tendency to slide
Block slides across a stationary rough floor - Kinetic friction opposes the sliding
Block rests on a rough incline - Static friction may act up the slope to prevent sliding
Static friction adjusts as needed, up to its maximum:
It is not always equal to (\mu_s N).
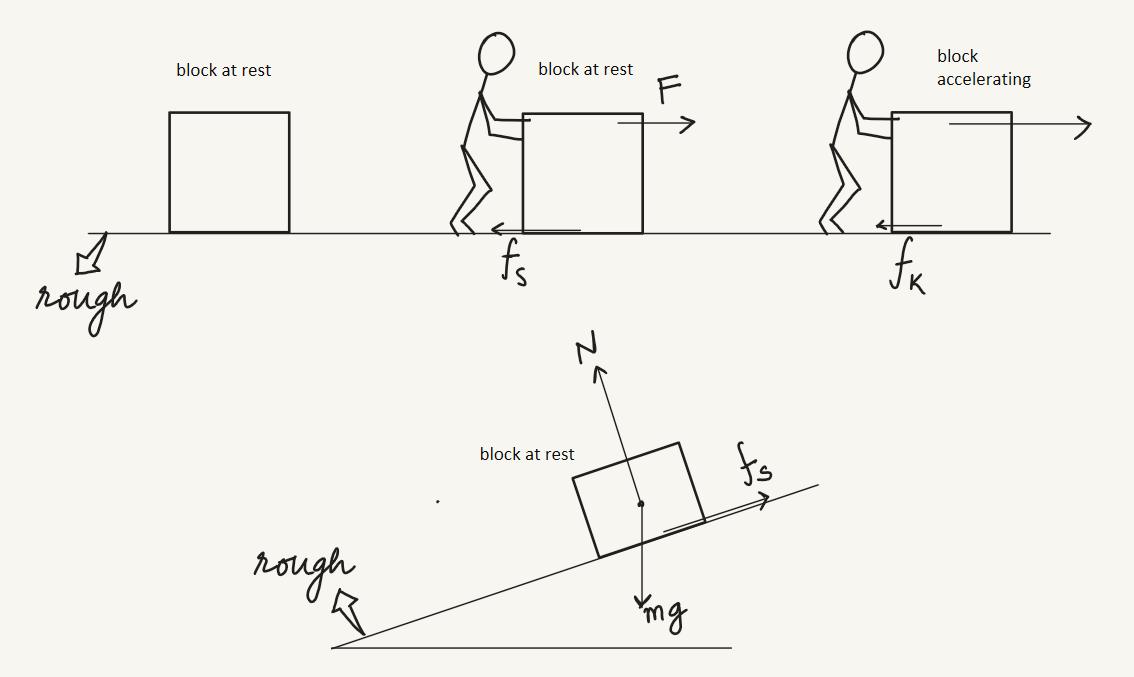
Movement alone does not imply kinetic friction. A wheel rolling without slipping, for example, is not sliding at its contact.
Before drawing: check the interactions
Ask yourself:
Contact? Check normal contact force and whether friction is needed.
Taut string? Check tension along the string.
Stretched or compressed spring? Check spring force.
Gravity? Include weight or the relevant gravitational force.
Electric or magnetic interaction? Include it when the situation requires it.
Then check that you have drawn each force once. Components replace a force in your calculation; they are not extra forces.
Turn the diagram into an equation
A block slides right. An applied force of acts right, and friction of acts left.
Taking right as positive:
The acceleration is to the right.
That is what a good free-body diagram does: it makes the correct equation easier to see.
Before moving on, check three things:
Every arrow is a force. Every force acts on your chosen body. The resultant agrees with the acceleration.
Struggling with Physics? Connect with me!